Background removal guide
Keep the artwork. Clean up the background.
Remove an unwanted background right inside the gang sheet builder. Watch the video, then follow these five steps to compare the results and check your design before printing.
Watch the walkthrough
1 min 27 sec · Follow along belowThis recording compares Original, Quick clean, and AI clean, previews the result on shirt colors, and checks print quality before adding copies to a sheet. Follow the written steps below at your own pace.
Before you start
- Have your original artwork and intended print dimensions ready. A larger, clearer original gives you more detail to work with.
- Know which parts of the design you want to keep, including any white lettering or small details.
- Choose the shirt color you plan to use so you can check the cleaned edges against it.
Upload your design
Open the gang sheet builder and click “Choose Artwork” on an empty sheet, or “Upload Image(s)” in the left panel. Select your file and wait for the “Add Image” window to prepare the background options.
If your artwork already has the transparent background you want, inspect the preview before making any changes.
Compare the background options
When a background is detected, compare “Original,” “Quick clean,” and “AI clean.” Original keeps the background. Quick clean removes the background color. AI clean offers another cleanup result; wait for it to finish processing, then compare the artwork itself.
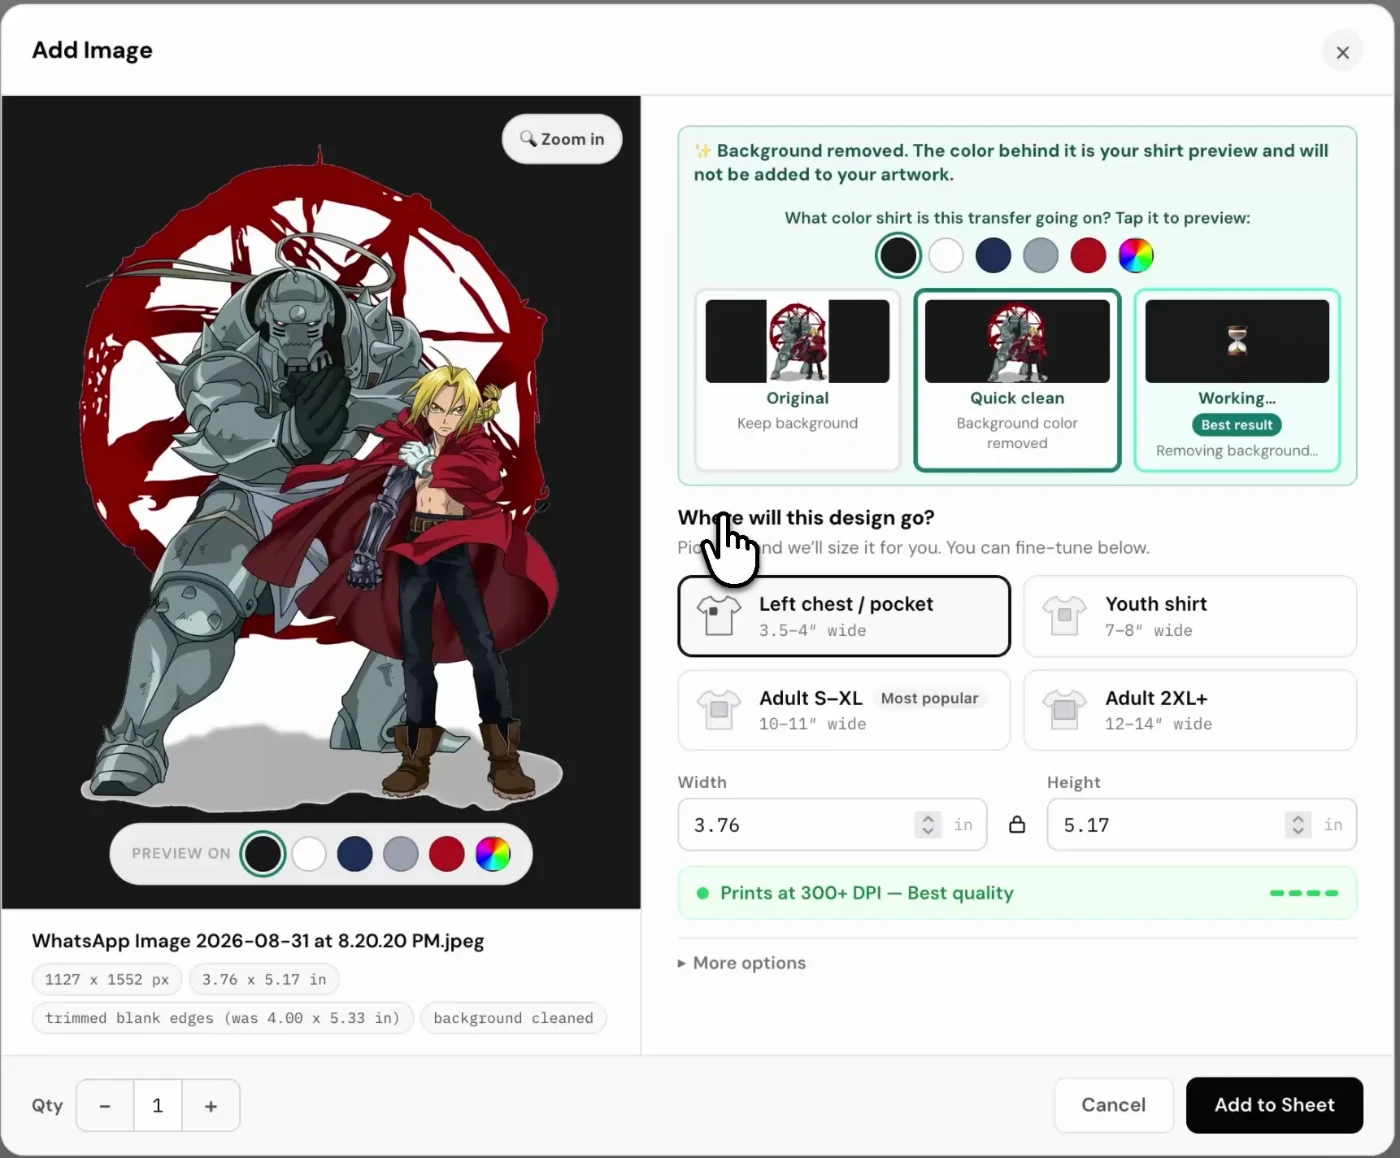
Look at enclosed spaces, thin lines, lettering, and the outer edges. Choose the version that keeps the details you need, even if another option is labeled “Best result.”
Preview it on your shirt color
Use the color circles under “What color shirt is this transfer going on?” or “Preview on” to inspect the cleaned artwork. Switch between a light and dark color to spot leftover background areas or missing details. Use “Zoom in” for a closer look.
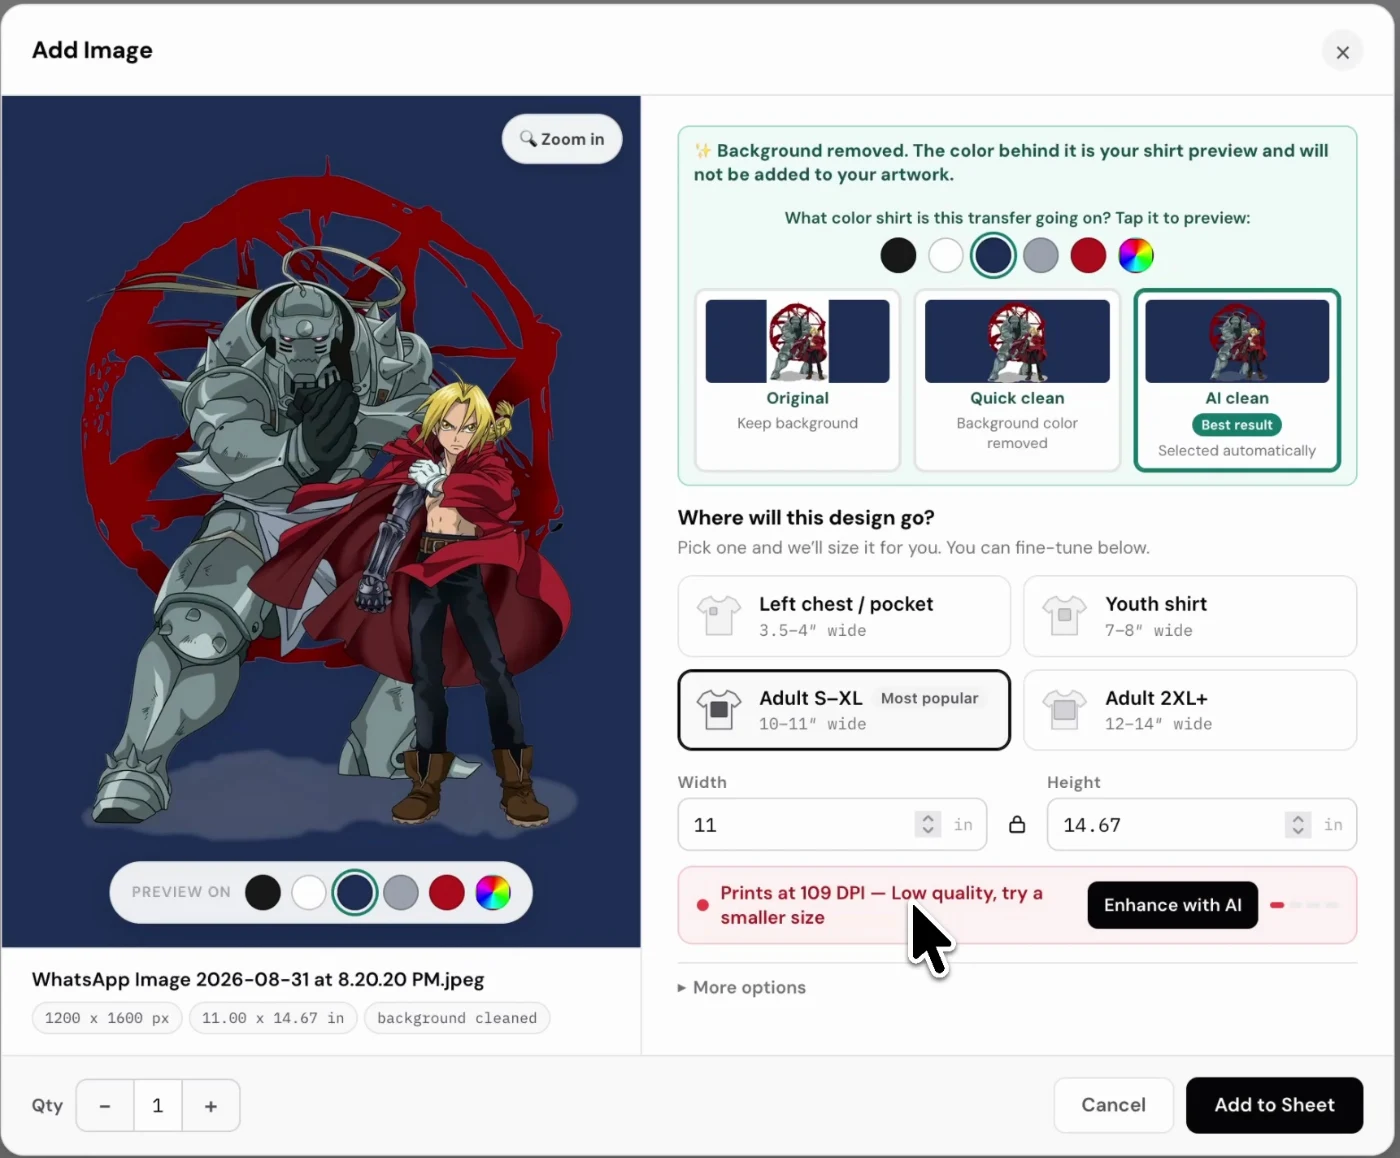
The shirt-preview color is only a preview. It is not added to your artwork and will not print as a colored rectangle.
Set the size and check print quality
Choose a placement preset or enter your finished width and height in inches. Read the quality indicator again after resizing. In the video, enlarging the design triggers a low-resolution warning, and “Enhance with AI” is used before continuing.
If quality is low, try a smaller size or a higher-resolution original. If you use AI enhancement, inspect the new result carefully—especially text and fine details—before accepting it.
Choose your quantity and add to sheet
Once the background, dimensions, and quality look right, set “Qty” and click “Add to Sheet.” Review the copies on the canvas, then finish your layout and check the current price before adding it to your cart.
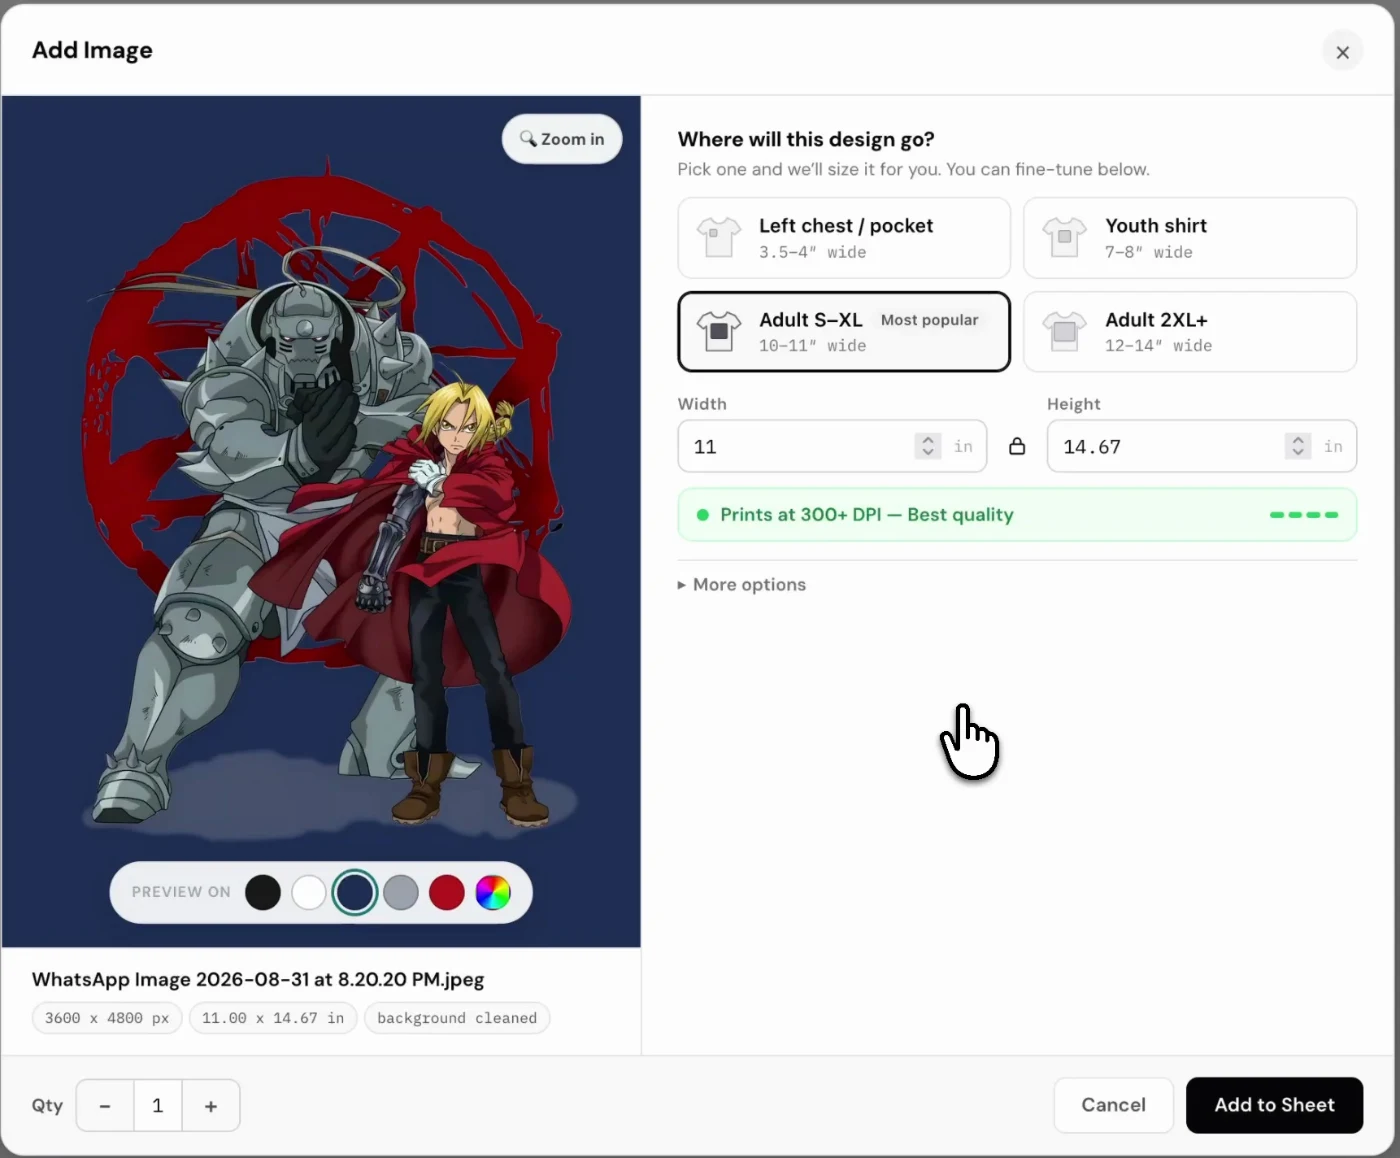
Check your artwork one last time before checkout. If the cleanup removes something you wanted to keep, return to your original file and compare the other options.
Try it with your artwork.
Keep this guide open while you work in the builder. Need another set of eyes on your design? We’re here to help.