Gang sheet builder guide
Your artwork. One sheet.
Here’s how to build it.
A gang sheet holds multiple transfers in one layout. Follow the video or the six steps below to upload, size, and arrange yours.
Watch the walkthrough
41 seconds · Follow along belowOur recording demonstrates uploading two designs, choosing sizes and quantities, and reviewing the finished sheet. The written steps below explain the same workflow. Prices shown in the recording are examples; use the current price in your builder.
Have these ready
- Your original artwork, ideally a transparent PNG at 300 DPI at the intended print size.
- The finished width or height you want for each transfer, measured in inches.
- The number of copies you need for each design.
Already have a complete print-ready gang sheet? Upload your finished sheet here.
Open the builder
Click “Build a Gang Sheet” on our website. If you see the starting options, choose “Build it automatically” to let the builder arrange your artwork and size the sheet around it, or “Choose a size” to select a sheet length first.
The video follows the automatic layout flow. You can mix different designs and print sizes on the same sheet.
Upload your artwork
Use “Upload Images” in the left panel and select a design from your device. The “Add Image” window opens with a preview of your artwork. Check that the background and edges look the way you want them to print.
A transparent PNG is a good starting point. Do not mirror your artwork before uploading.
Set the print size and quantity
Choose a placement preset, such as “Left chest / pocket” or “Adult S–XL,” or enter your desired width and height in inches. Keep the proportions locked to avoid stretching your design. Set “Qty” to the number of copies you need, then click “Add to Sheet.”
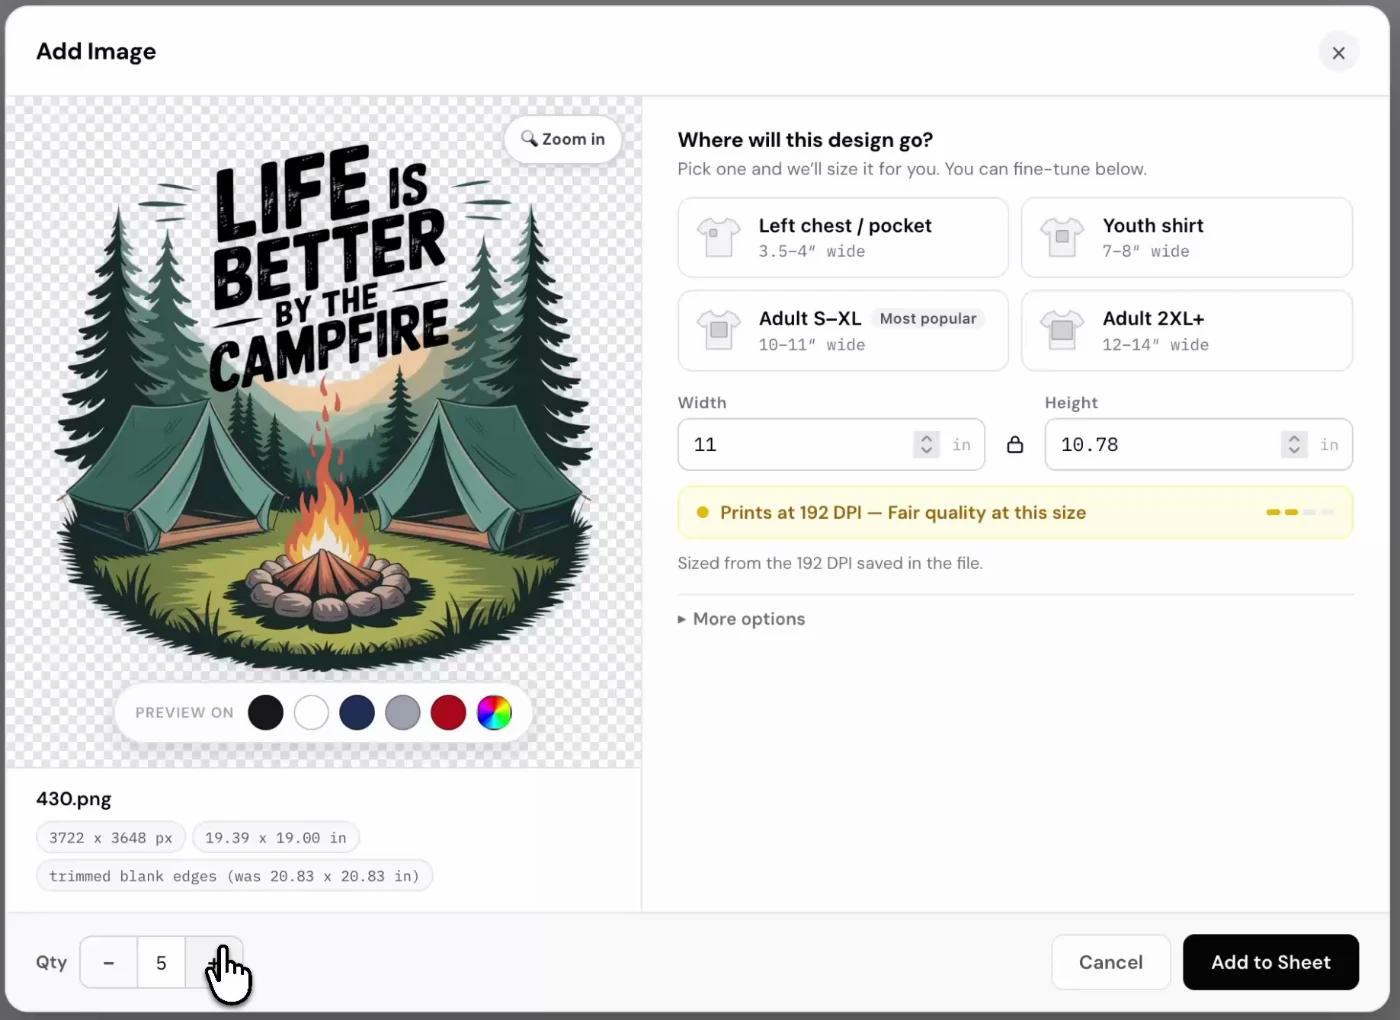
Read the print-quality indicator at your chosen size. Aim for 300 DPI; if quality is low, use a higher-resolution original or reduce the print size. Presets are starting points—measure your garment before ordering.
Check the automatic layout
After you add the design, its copies appear on the sheet. Review their size, count, and placement. Use the layout controls, including “Auto Build,” if you need to arrange the artwork again.
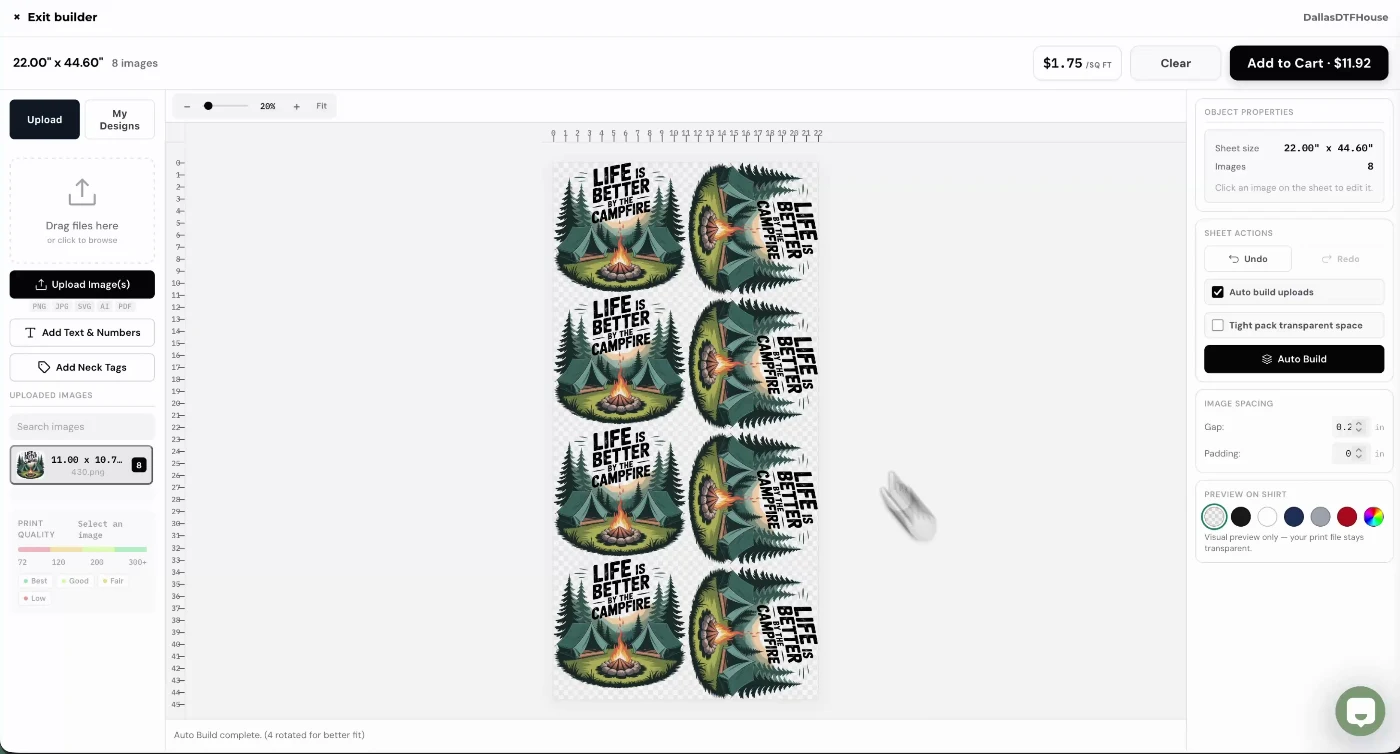
Make sure designs do not overlap and leave room to cut between transfers. Rotated artwork is fine as long as every design fits inside the sheet.
Add your other designs
Click “Upload Images” again to add another design. Choose its own print size and quantity, then click “Add to Sheet.” Repeat for each design you want to include and review the updated layout.
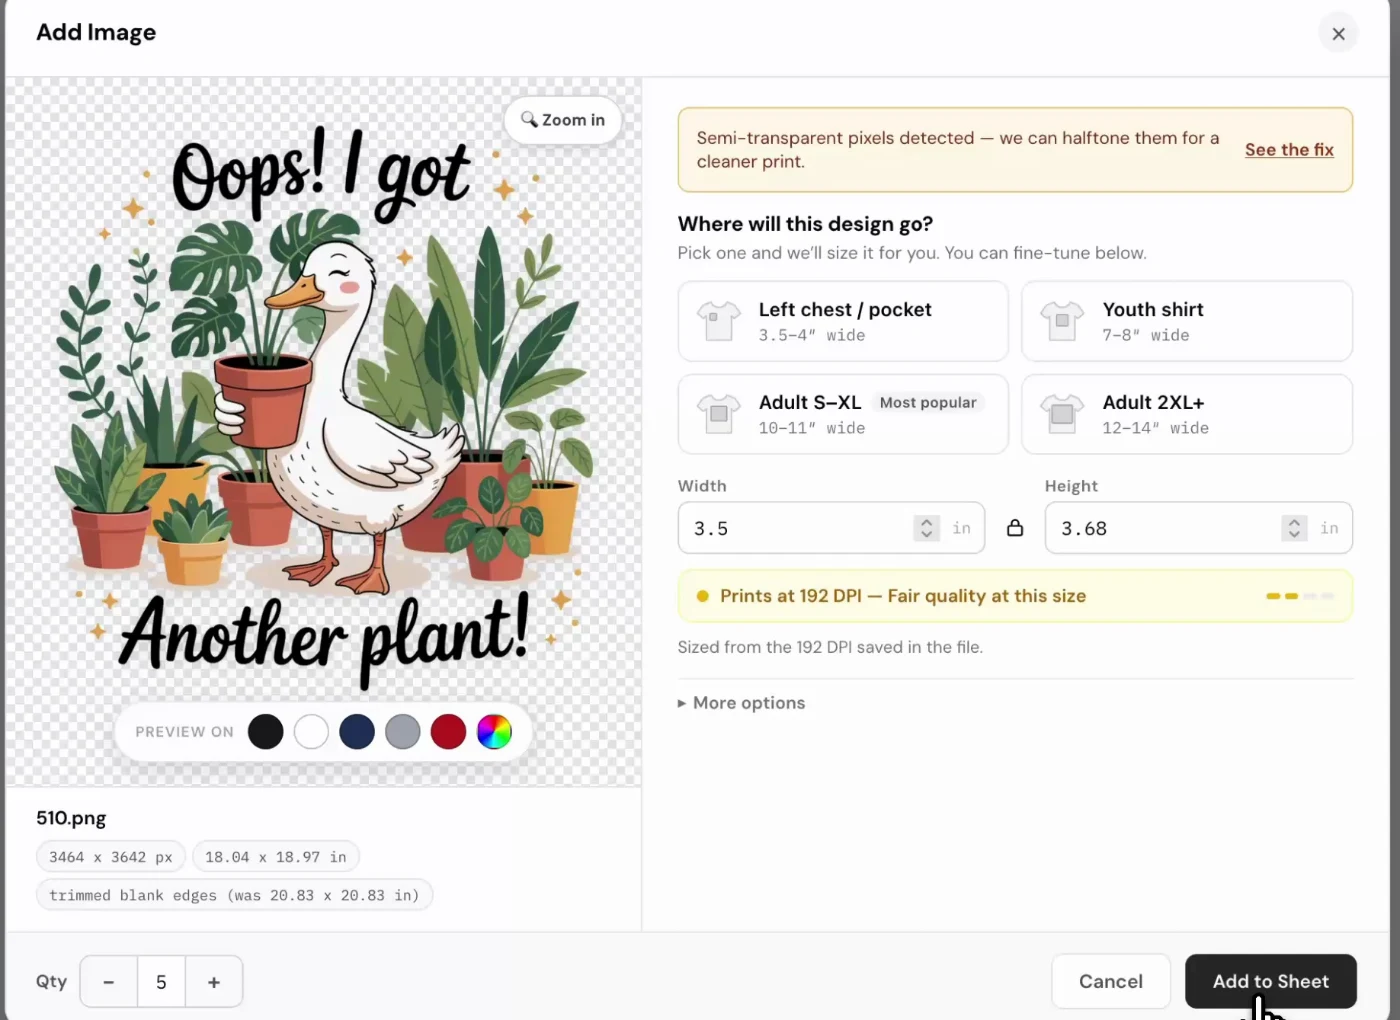
Need a large front print and a small pocket print? Add the artwork separately at each size, with the quantity you need for each.
Review your sheet and add to cart
Look over the complete sheet and the displayed price. Confirm every design, print dimension, and quantity, then click “Add to Cart” in the upper-right corner. Review the item in your cart and continue through checkout to place your order.
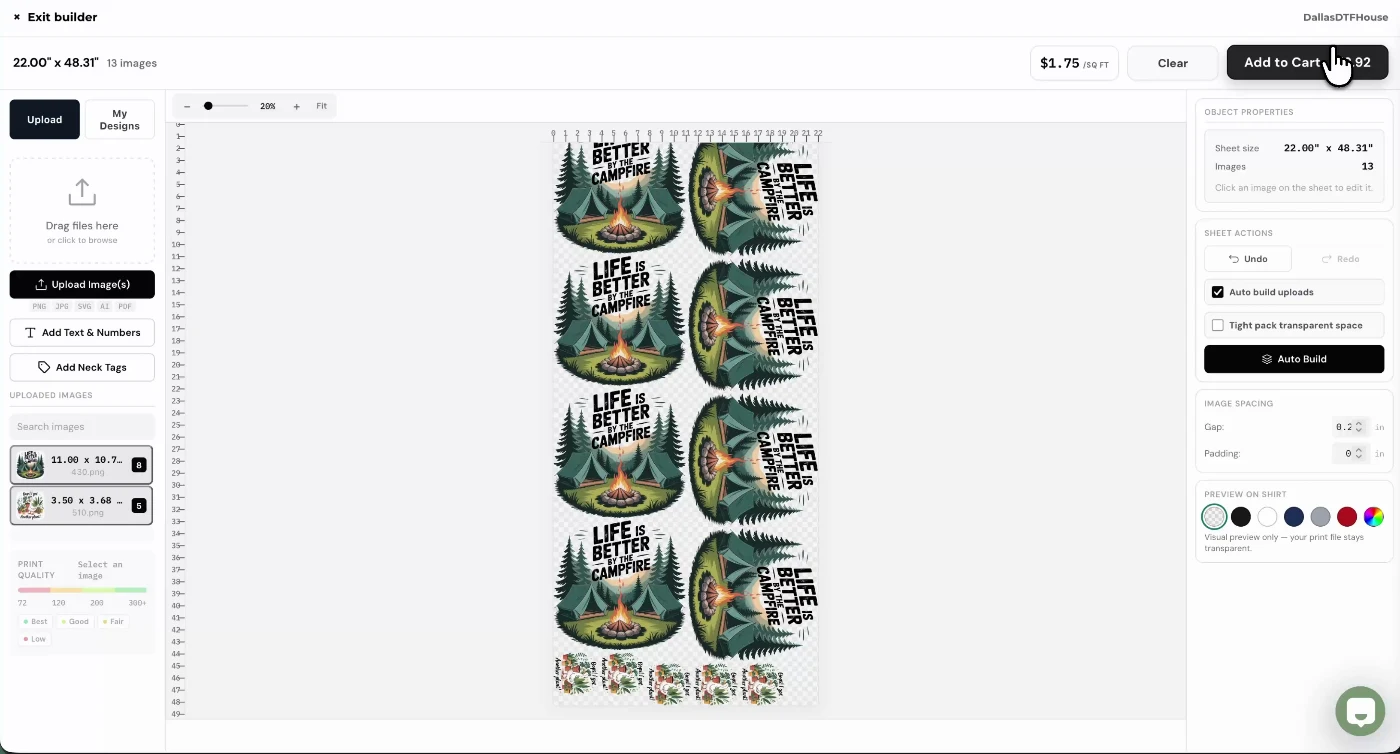
Adding a sheet to your cart does not place the order. Complete checkout and look for your order confirmation.
Need to clean up your artwork?
Follow our dedicated video guides before finishing your sheet.
Ready to make your first sheet?
Keep this guide open while you build. If you get stuck, send us a message and we’ll help you through it.