Halftones & knockout guide
Let the shirt show through your design.
Follow our halftones video to use Knockout with “Halftone soft edges.” Choose the color to remove, adjust the effect, and preview your artwork against the shirt before applying it.
Watch the walkthrough
1 min 31 sec · Follow along belowThis walkthrough uses the Knockout tool with “Halftone soft edges” checked. It shows color selection, strength adjustments, shirt-color previews, and the applied result. The written steps below follow those controls.
Know what you’re changing
- Knockout lets the garment show through where the selected color is removed from your artwork. The video uses black as the knockout color.
- “Halftone soft edges” is a checkbox inside Knockout Preview. This guide follows that workflow; the builder also has a separate Halftone button.
- Have your intended shirt color and print size ready. Keep your original file so you can start again if you want a different result.
Add your artwork and select it
Upload your design, set its print dimensions, and click “Add to Sheet.” Select the design on the canvas so its editing controls appear in the right panel.
Check that the selected artwork is the design you intend to edit before applying an effect.
Open the Knockout preview
In the right panel, expand “Edit Image” if needed. Find the “KNOCKOUT” section and click “Knockout…” to open the preview window.
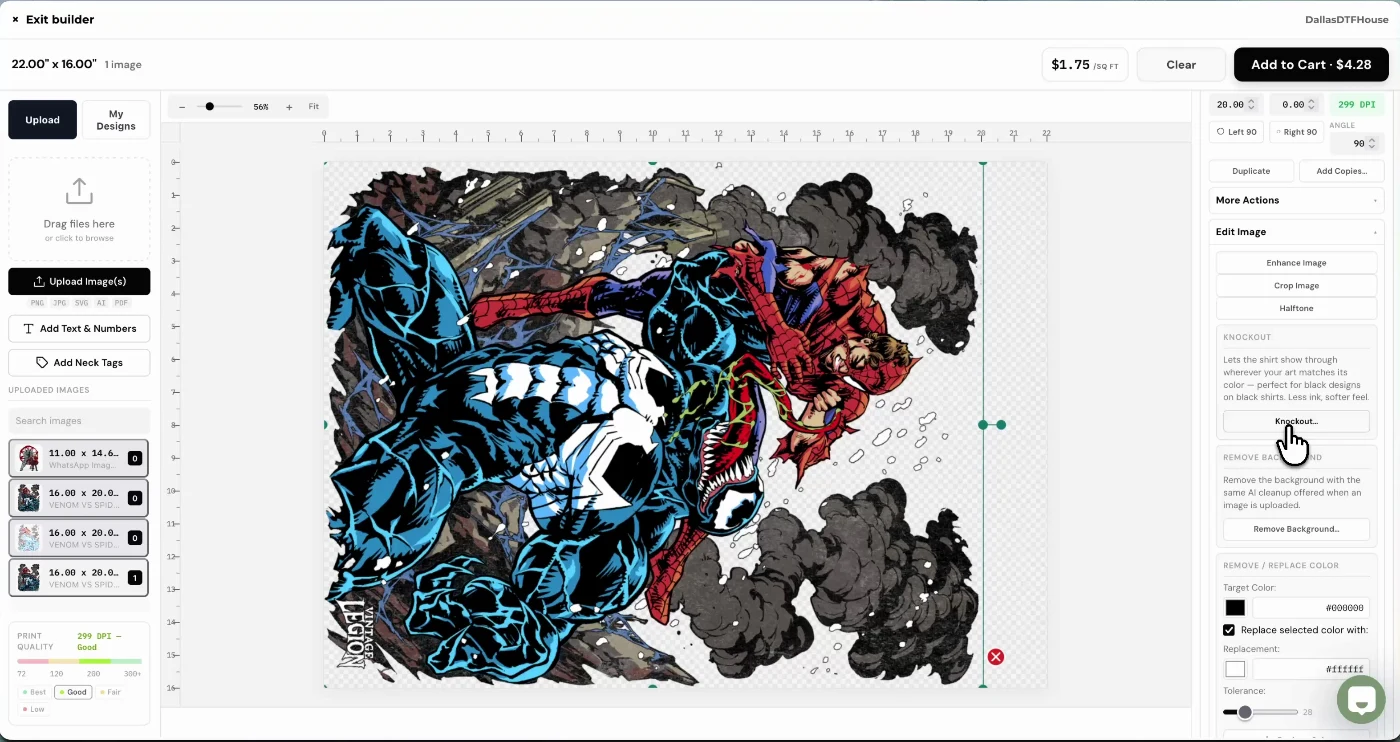
For the workflow shown in this video, use “Knockout…” and its “Halftone soft edges” checkbox.
Choose the color and adjust the strength
Set “Knockout Color” to the color you want removed. The recording uses black (#000000). Move the “Strength” slider while watching the preview, and keep “Halftone soft edges (recommended)” checked to use the option shown in the video.
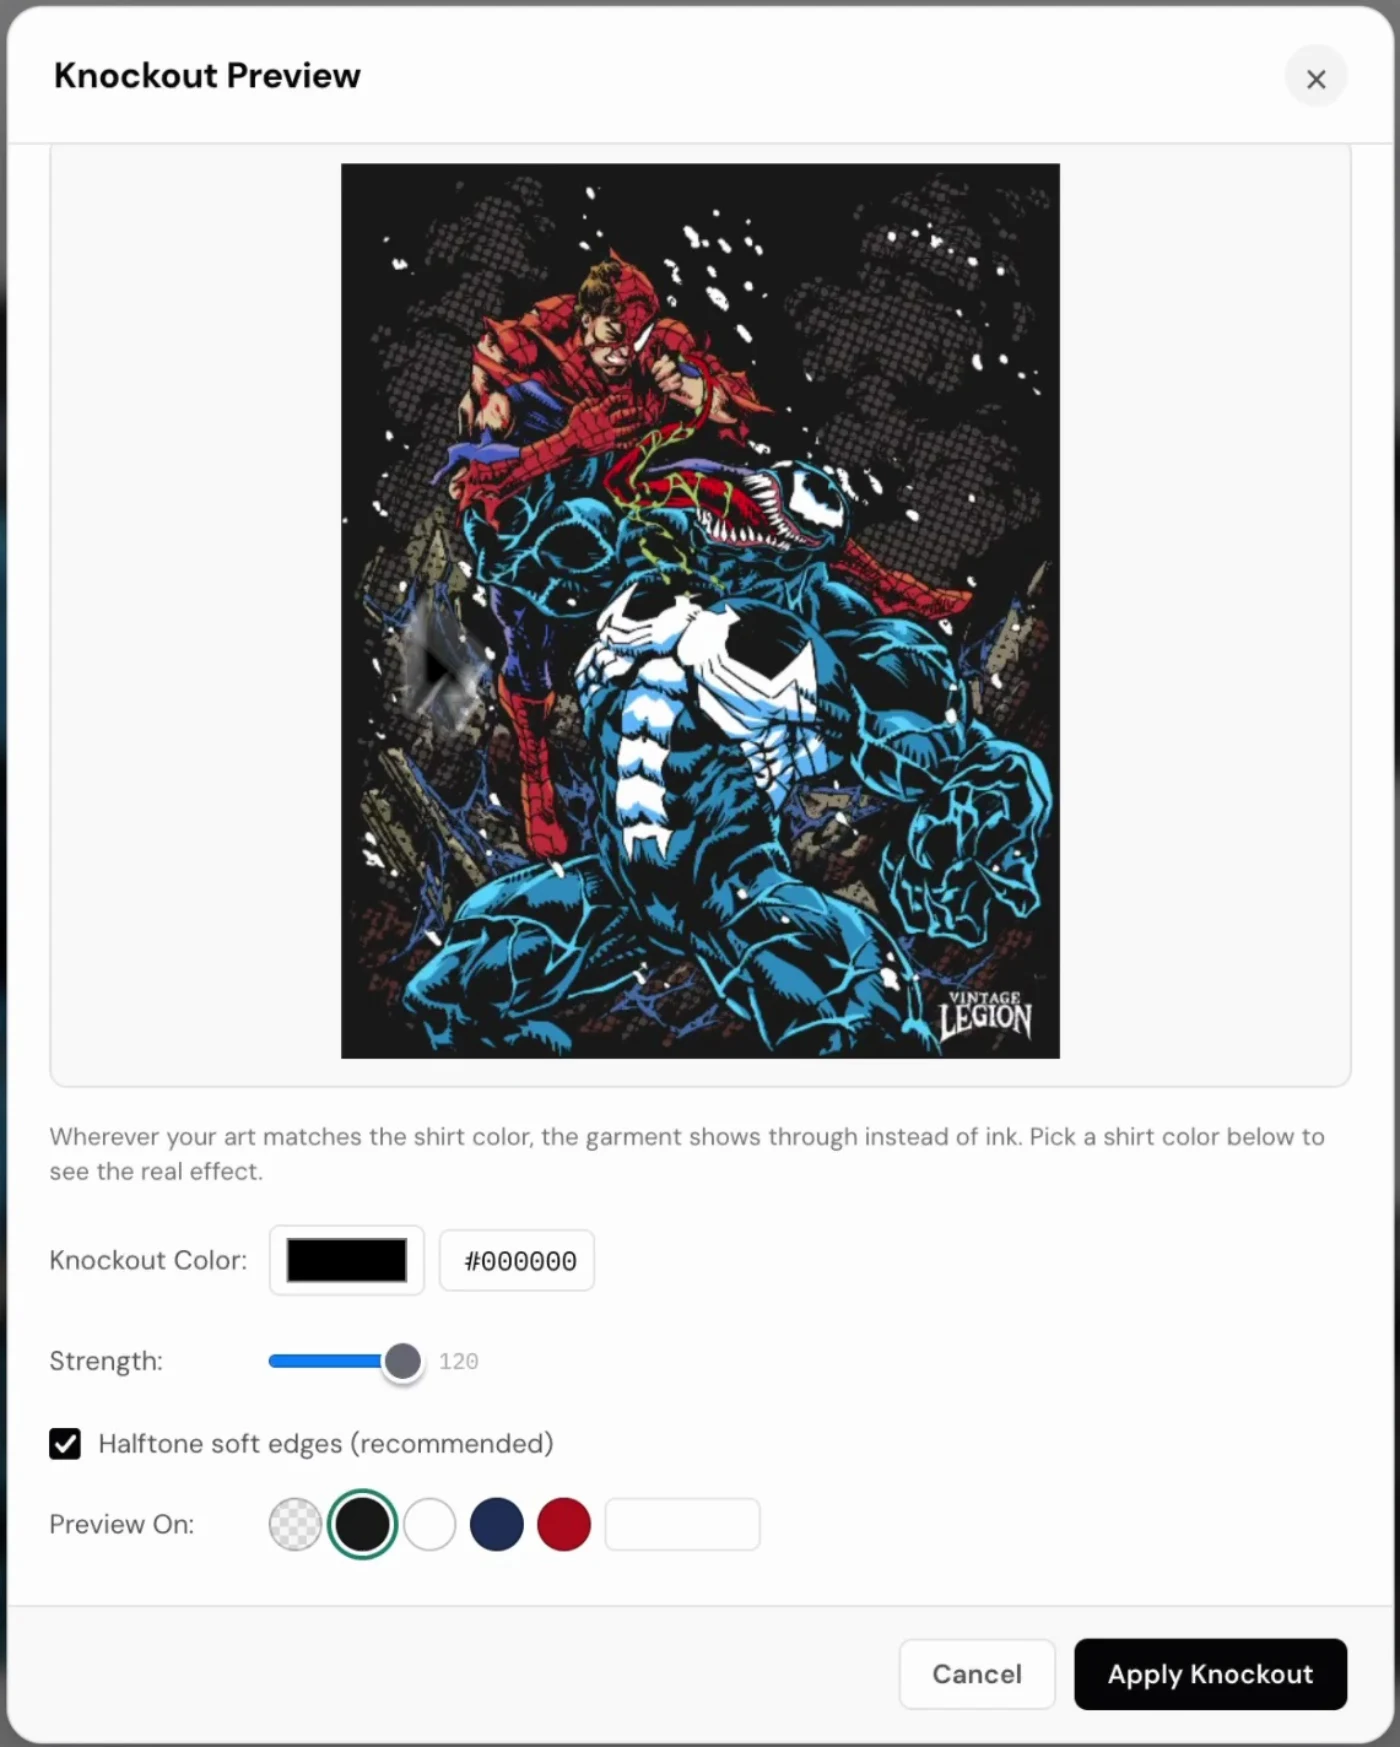
Use the preview to judge the result instead of copying a slider value. Check that outlines, lettering, and important details remain visible as you adjust it.
Compare the result on shirt colors
Use the “Preview On” swatches to view the effect on your planned shirt color. Try a contrasting color and the checkerboard preview to see where the garment will show through. The video switches between black, white, and red previews.
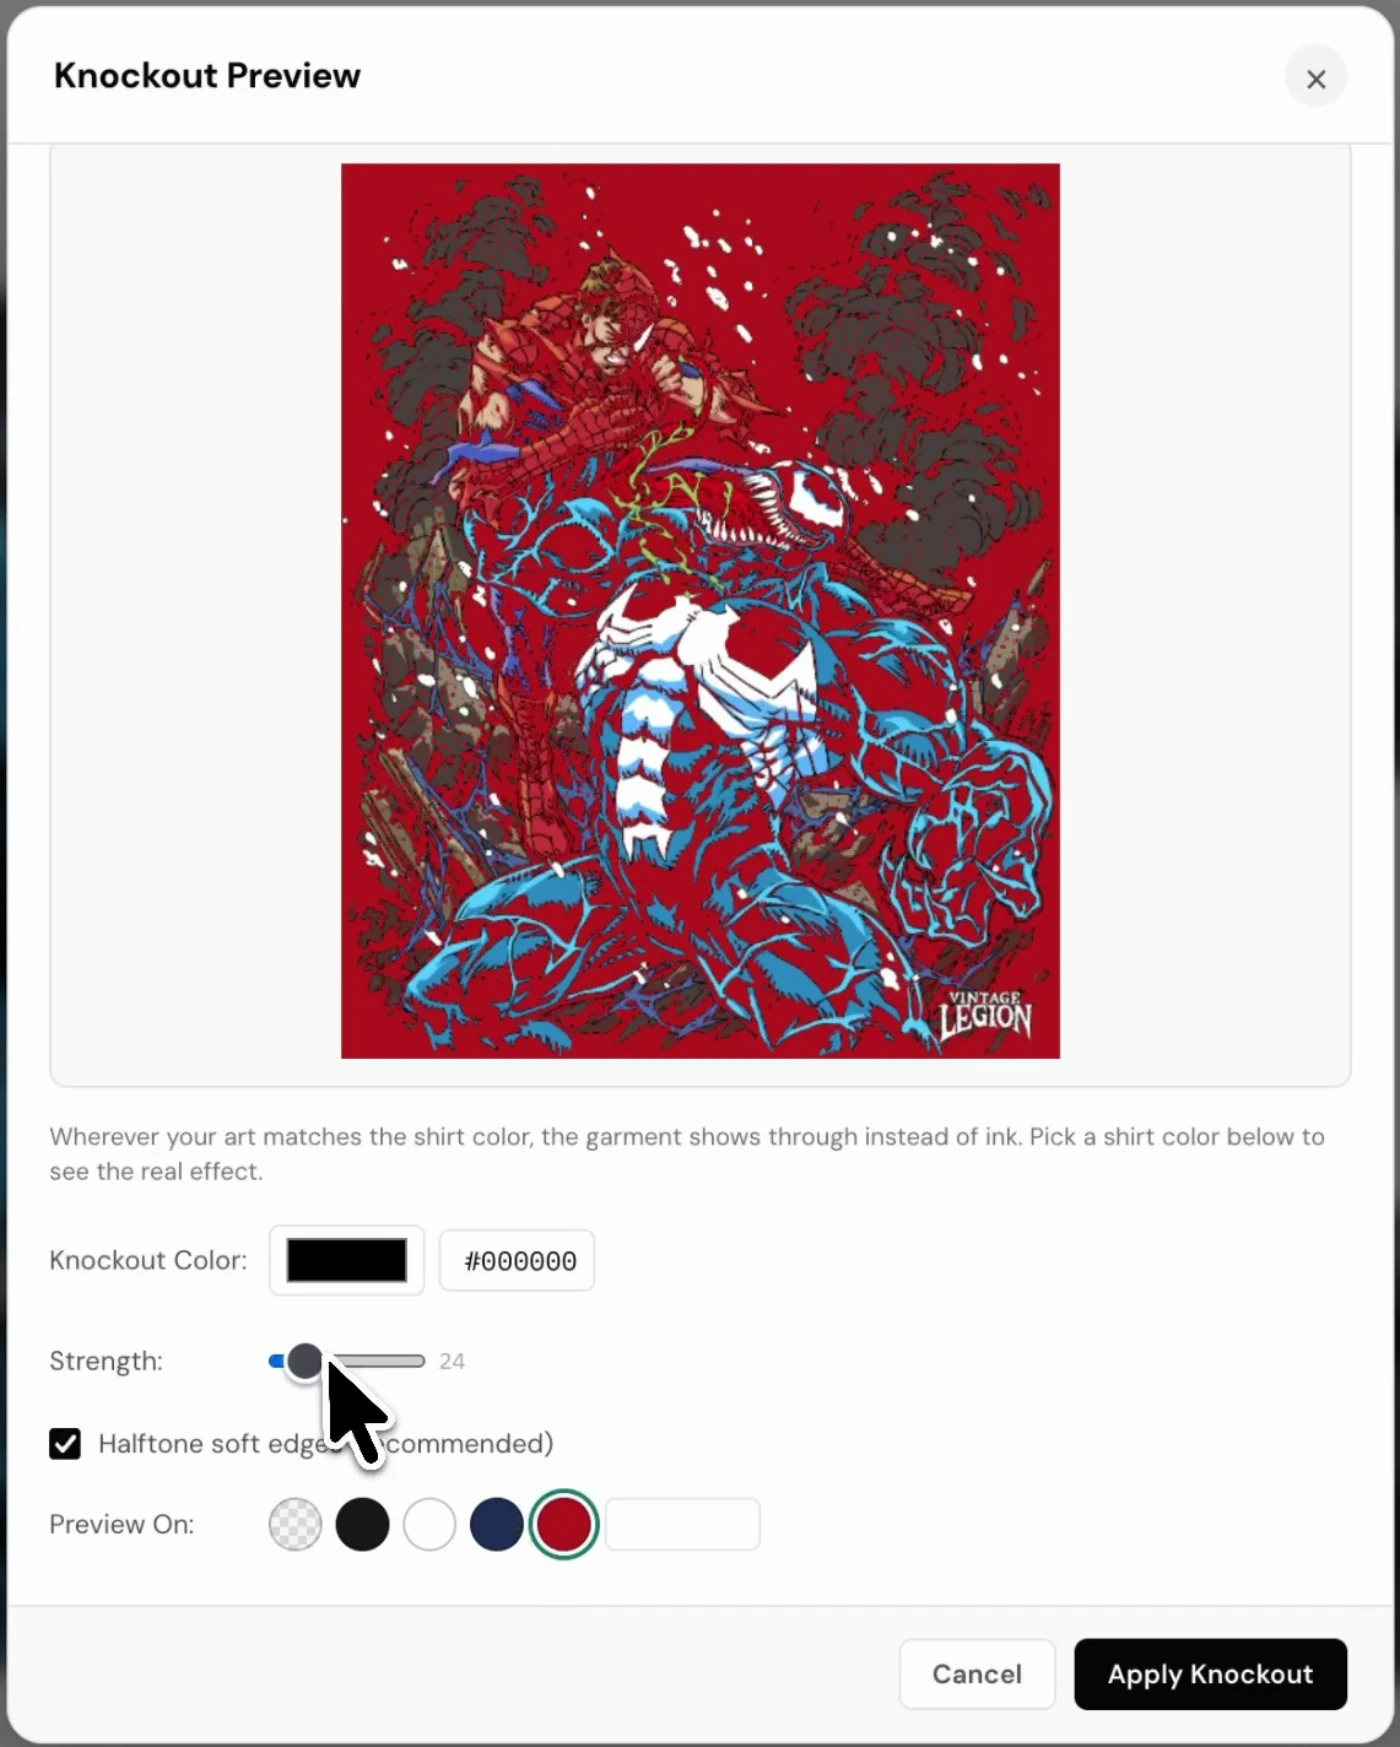
“Knockout Color” changes which color is removed. “Preview On” changes only the background used to inspect the result; it does not recolor your artwork.
Apply Knockout and inspect the sheet
When the preview looks right, click “Apply Knockout.” Back on the canvas, zoom in to inspect the edges and fine details. Use “Preview on shirt” to compare the applied design on your intended garment color before finishing the sheet.
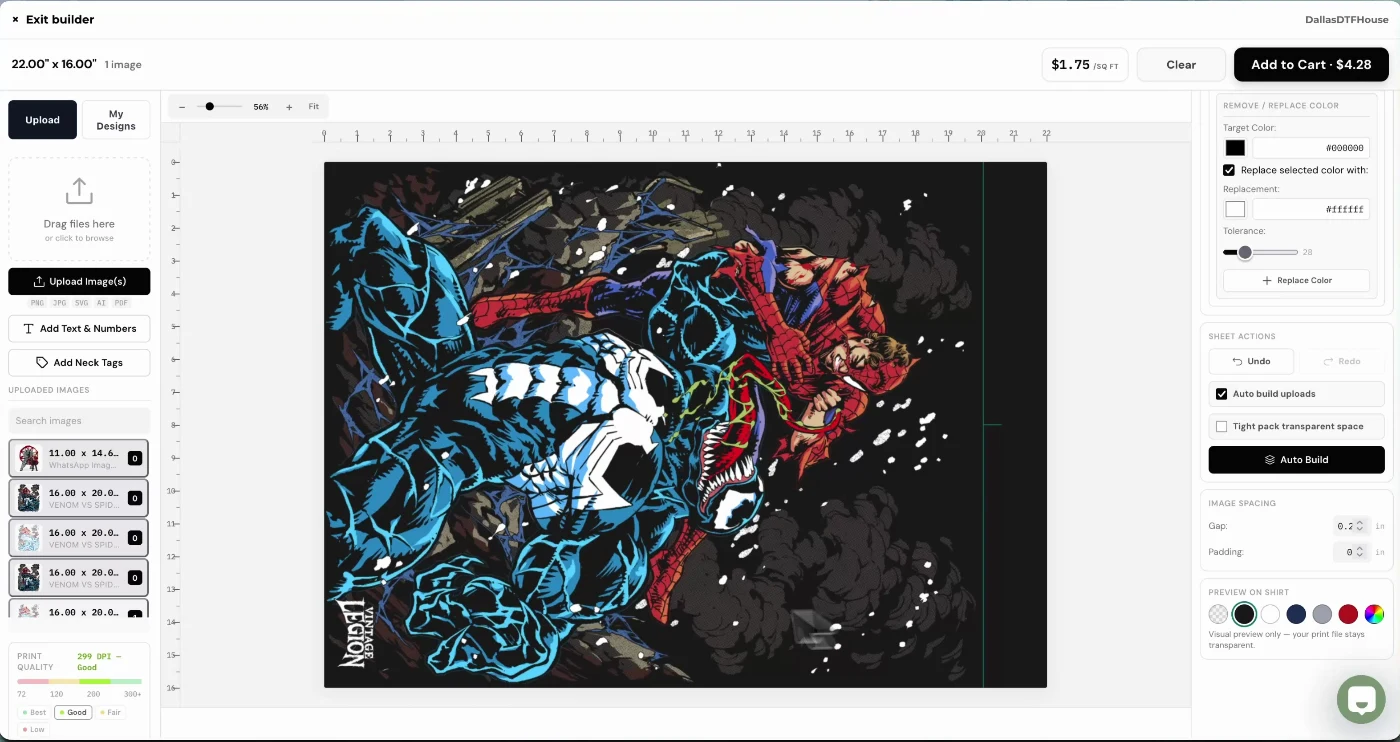
Check your final design size, copy count, and layout before adding to cart. Use the current builder price; the price in the recording is only an example.
From the builder to the shirt
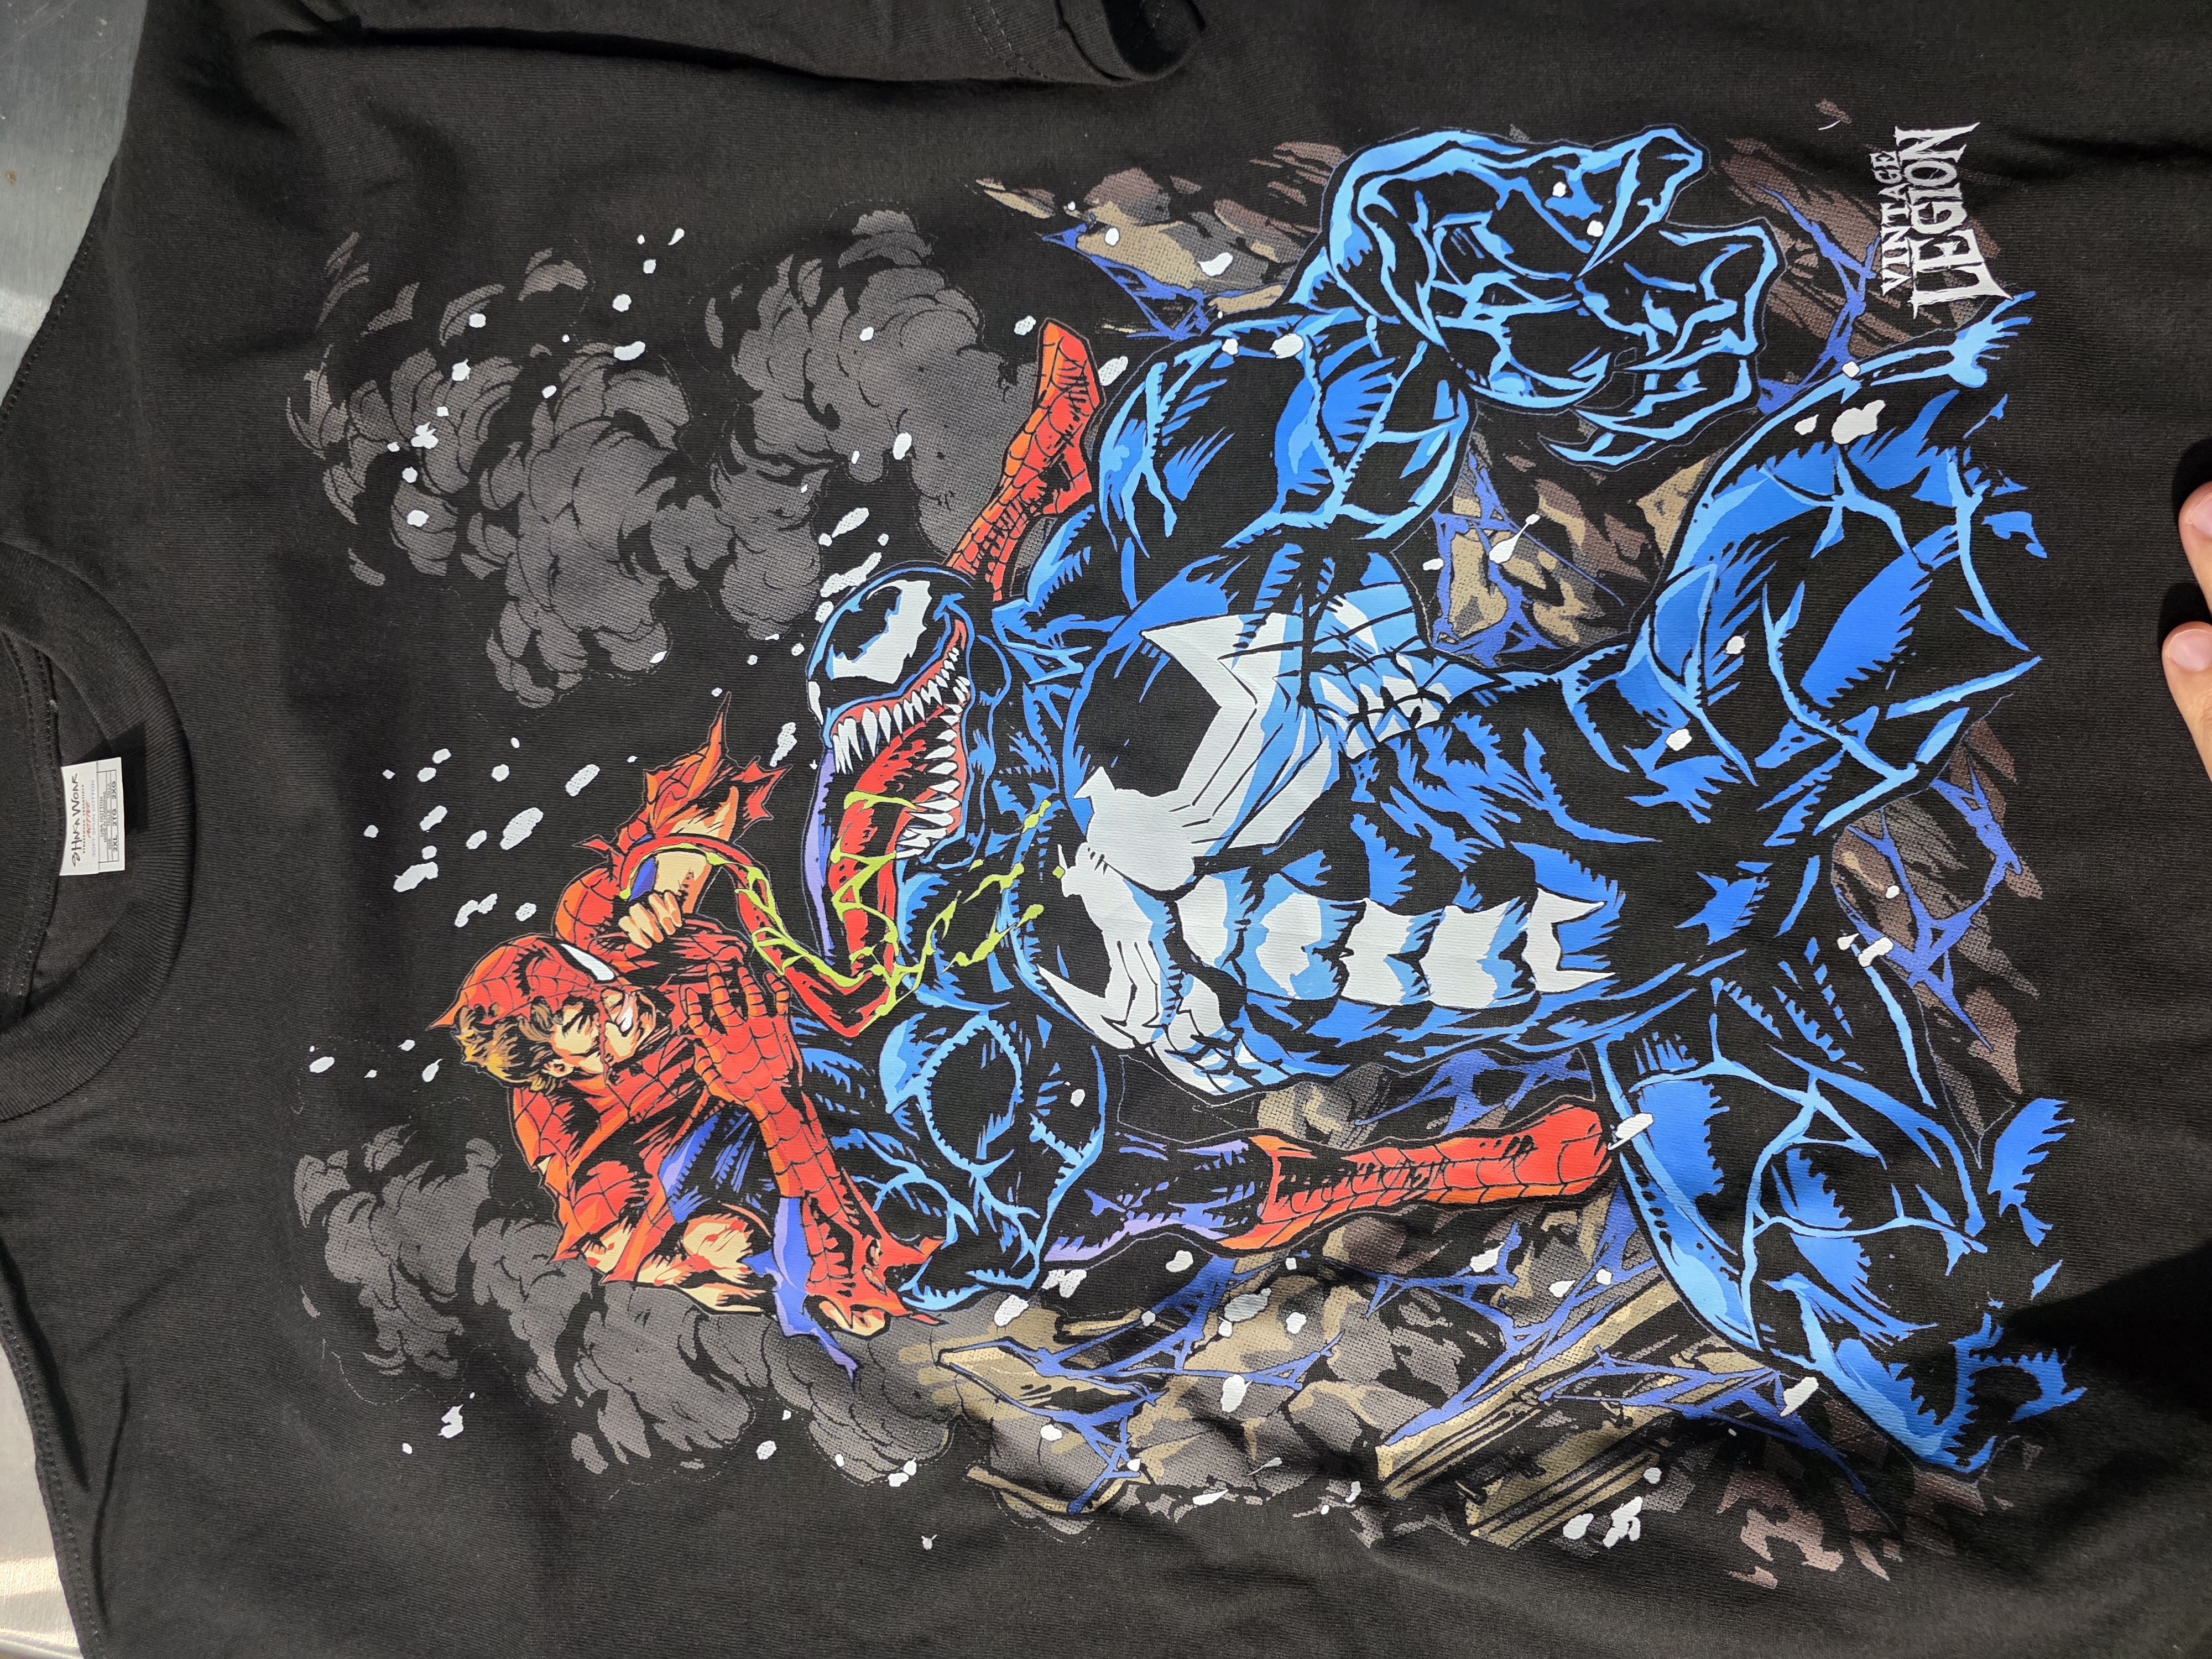
See the actual printed result.
The same artwork from the walkthrough, printed on a black shirt. Look closely at the smoke and shaded areas to see the halftone texture alongside the solid colors.
Try it with your artwork.
Keep this guide open while you work in the builder. Need another set of eyes on your design? We’re here to help.